
Your Complete Guide to Dislocation First Aid & Home Care
Know about the dislocation aid, step-by-step procedure for home care, difference from fracture, recovery process and more.

Written by Dr. Shaik Abdul Kalam
Reviewed by Dr. D Bhanu Prakash MBBS, AFIH, Advanced certificate in critical care medicine, Fellowship in critical care medicine
Last updated on 13th Jan, 2026

Introduction
A sudden fall, an awkward twist during sports, or a sharp impact—and you feel a pop followed by excruciating pain. You might be facing a joint dislocation, a serious injury where the ends of your bones are forced out of their normal position. Knowing what to do in the first critical minutes can significantly impact recovery and prevent further damage. This guide goes beyond a standard dislocation first aid kit, providing a comprehensive roadmap from the moment of injury through professional treatment and into the healing process at home. We’ll detail exactly what you need to have on hand, the immediate steps to take (and avoid), and what to realistically expect during your recovery journey.
What is a Joint Dislocation? Understanding the Injury
A dislocation is a severe injury to the ligaments and capsule surrounding a joint. Ligaments are tough, fibrous tissues that connect bones. When a joint experiences force beyond its normal range of motion, these ligaments can tear, allowing the bones to slip out of place. This results in intense pain, immediate swelling, visible deformity, and a complete loss of joint function. It is a medical emergency that requires professional care to "reduce" or put the joint back into its correct alignment.
Common Joints Prone to Dislocation
While any joint can be dislocated, some are more vulnerable due to their anatomy and mobility. The shoulder joint (glenohumeral joint) is the most commonly dislocated, thanks to its incredible range of motion and relatively shallow socket. Other frequently affected joints include fingers (often from catching a ball wrong), elbows, knees, and hips. A dislocated kneecap (patella) is also a common injury, particularly among young athletes.
Consult a General practitioner for Personalised Advice
Dislocation vs. Fracture: Knowing the Difference
It can be very difficult to tell a severe dislocation from a fracture (broken bone) without an X-ray, as both cause severe pain, swelling, and an inability to move the limb. Often, they can occur together. However, a dislocation typically presents with a more obvious and dramatic deformity—the limb may look visibly crooked or misshapen in a way that a fracture usually does not. Regardless, the initial first aid for a broken bone or dislocation is identical: immobilise the area and seek immediate medical attention. Never try to diagnose it yourself.
Your Dislocation-Specific First Aid Kit: What You Really Need
While a standard first aid kit has Band-Aids and antiseptic wipes, a kit tailored for musculoskeletal injuries needs different tools. Here’s how to build a sports injury first aid kit that can handle a dislocation emergency.
Essential Items for Immobilisation and Support
Triangular Bandage: This is the single most versatile item. It can be folded into a broad-band sling for arm or shoulder injuries or used as a cravat to secure a splint.
Rigid Splints: They are lightweight, can be cut to size, and provide firm support to keep the joint immobile.
Conforming Gauze Roll: Used to wrap around splints and bandages to hold them securely in place without cutting off circulation.
Safety Pins: Essential for securing the ends of a triangular bandage sling.
Comfort and Care: Beyond the Basics
Instant Cold Packs: These don’t require refrigeration. Just squeeze to activate and provide immediate cold therapy to reduce swelling and pain.
Pain Relievers: Include a small bottle of over-the-counter anti-inflammatory medication like Ibuprofen (Advil, Motrin). Note: Only administer if the person is conscious, alert, and has no known allergies.
Medical Shears/Scissors: Strong scissors are crucial for safely cutting away clothing to assess the injury without moving the limb.
Non-Latex Gloves: To protect both the responder and the injured person from potential infection.
Where to Keep Your Specialised First Aid Kit
This kit shouldn’t be buried in a closet. Keep it in your car for road trips, in your bag for sporting events, hiking, or any high-risk activity. At home, store it in an easily accessible location, known to all family members.
Immediate First Aid for a Suspected Dislocation: A Step-by-Step Guide
Step 1: Call for Emergency Help
This is your first and most important action. Call for an ambulance immediately. Dislocations can involve nerve or blood vessel damage, which requires urgent professional assessment.
Step 2: Don't Move the Joint (The Golden Rule)
Under no circumstances should you try to "pop" the joint back in yourself. This is called reduction and must be done by a trained medical professional. Forcing it can cause severe damage to ligaments, nerves, and blood vessels.
Step 3: Immobilise the Injury
Support the injured joint in the position you found it. Do not try to straighten it. Use your homemade splint or items of clothing to cradle the limb and prevent any movement. For a shoulder injury, use a triangular bandage to make a sling.
Step 4: Apply Ice to Reduce Swelling
Gently apply an instant cold pack or a bag of ice wrapped in a cloth to the area. Do not apply ice directly to the skin. This will help numb the pain and minimise swelling.
Step 5: Manage Shock and Stay Comfortable
Injuries like this can send the body into shock. Help the person lie down if possible, keep them warm with a blanket or jacket, and reassure them calmly until help arrives.
What NOT to Do: Critical Mistakes to Avoid
DO NOT try to reduce the joint yourself.
DO NOT allow the person to eat or drink anything, in case they need surgery.
DO NOT massage the area or apply heat, as this will increase swelling.
DO NOT move the person unnecessarily unless they are in immediate danger.
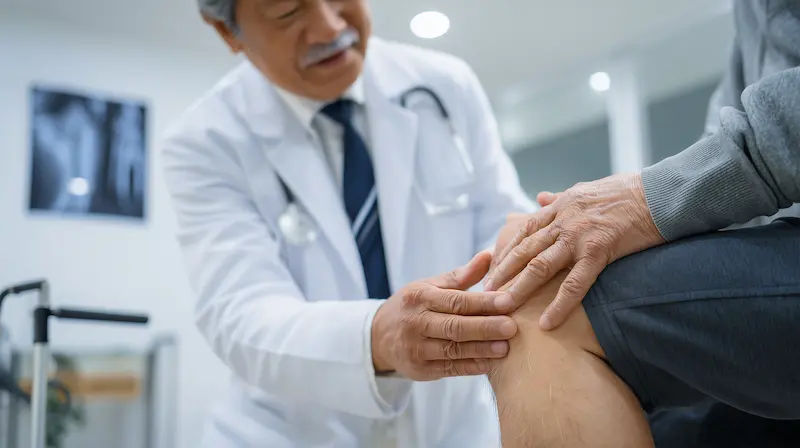
What to Expect at the Hospital: The Reduction Process
At the hospital, a doctor will assess the injury with a physical exam and X-rays. The primary treatment is joint reduction. This is the procedure where the doctor manipulates the bone ends back into their proper position. This is often done after administering pain medication or sedation. You will likely hear a satisfying "clunk" or "pop" when the joint goes back into place, followed by immediate relief from the severe pain. After reduction, the joint will be immobilised with a splint or sling for several weeks to allow the torn ligaments to heal.
The Road to Recovery: Home Care After Medical Treatment
It includes:
Managing Pain and Inflammation at Home
Your doctor will likely prescribe or recommend pain medication. Strictly follow the dosage instructions. Consistently applying the RICE method is the cornerstone of home care after dislocation reduction.
The Role of Rest, Ice, Compression, and Elevation (RICE)
Rest: Avoid any activities that strain the injured joint. Use your sling or splint as directed.
Ice: Apply ice packs for 15-20 minutes every 2-3 hours for the first few days to control swelling.
Compression: An elastic bandage (like an ACE wrap) can provide gentle compression to limit swelling, but ensure it is not too tight.
Elevation: Keep the injured limb propped up above the level of your heart as much as possible to drain fluid and reduce swelling.
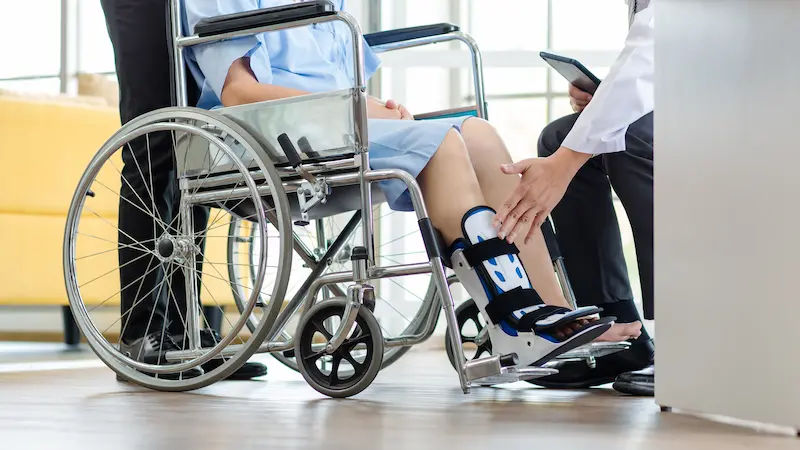
Gradual Rehabilitation and Physical Therapy
After the initial immobilisation period, the joint will be stiff and the muscles weak. Physical therapy is non-negotiable. A therapist will guide you through exercises to restore your range of motion, strength, and stability. Skipping PT significantly increases the risk of re-injury and long-term problems like chronic instability.
When to Seek Further Medical Advice
While some pain and stiffness are expected, contact your doctor or seek immediate care if you experience:
Increased redness, swelling, or pain.
Numbness, tingling, or a cold, pale limb (signs of circulatory or nerve issues).
Fever, which could indicate an infection.
The joint feels unstable or gives way after recovery.
If your pain is not managed by prescribed medication or you experience new numbness during recovery, consult a doctor online with Apollo24|7 for prompt advice on next steps.
Conclusion
A dislocation is a frightening and painful experience, but being prepared can make a world of difference. By building a proper dislocation first aid kit, memorising the critical steps of immobilisation and ice, and understanding the importance of professional care, you can become a vital first responder for yourself or others. Recovery is a marathon, not a sprint. Patience with the healing process and dedication to your rehabilitation exercises are the keys to restoring full function and preventing future injuries. Remember, your first job is to stabilise the situation and get expert help—everything else follows from there.
Consult a General practitioner for Personalised Advice
Consult a General practitioner for Personalised Advice

Dr Suseela
General Physician
5 Years • MBBS
Bengaluru
Apollo Medical Center, Marathahalli, Bengaluru

Dr. Rajib Ghose
General Physician/ Internal Medicine Specialist
25 Years • MBBS
East Midnapore
VIVEKANANDA SEBA SADAN, East Midnapore
Dr. Rashmi Wadhwa
General Practitioner
35 Years • MBBS
South Delhi
RASHMI WADHWA'S CLINIC, South Delhi
(75+ Patients)

Dr. Sanjukta Das
General Physician
9 Years • MBBS
Kolkata
MCR SUPER SPECIALITY POLY CLINIC & PATHOLOGY, Kolkata

Dr. Ashita Kuruvilla
General Practitioner
7 Years • MBBS
Kolkata
KVC CLINIC, Kolkata
More articles from Preventive Treatment

.webp)

Frequently Asked Questions
1. How long does it take to recover from a dislocated shoulder?
Full recovery from a shoulder dislocation typically takes 12 to 16 weeks. This includes several weeks of immobilisation followed by a prolonged period of physical therapy to regain strength and stability.
2. Can a dislocation heal on its own?
No. A dislocated joint requires medical intervention to be reduced (put back in place). It will not heal correctly on its own and will lead to chronic pain, instability, and arthritis if left untreated.
3. What is the one thing I should never do for a dislocation?
You should never, under any circumstances, try to pop the joint back into place yourself. This can sever nerves, damage blood vessels, and fracture bones, turning a bad injury into a catastrophic one.
4. How can I tell if it's dislocated or just badly sprained?
It's very difficult without an X-ray. Both cause significant pain and swelling. The hallmark of a dislocation is a visible deformity—the limb looks out of place or crooked. A severe sprain may be just as painful but without the obvious misalignment. Always assume it's a dislocation and seek medical care.
5. Why is physical therapy so important after a dislocation?
The ligaments that hold the joint together are torn. Even after healing, they are often stretched and weak. PT strengthens the muscles around the joint to compensate for this ligamentous laxity, providing dynamic stability and drastically reducing the risk of re-dislocation.